

仮想化ソフトの自動設定ツールVagrantでCentOSの学習環境を構築するための方法をまとめました。

目次
Vagrantとは
Wikipediaによると、Vagrantは、FLOSSの仮想機械を構築するためのソフトウェアで、構成情報を記述した設定ファイル (Vagrantfile) を元に、仮想環境の構築から設定までを自動的に行うことができます。
Vagrantは、HashiCorp社からWindows、MacOS、Linux版が提供されています。利用目的は様々ですが、冒頭に説明したとおり、資格取得対策用の学習環境構築のために利用することにします。
Vagrantのインストール
HashiCorp社の公式サイトから利用中のパソコンのOSにマッチするパッケージをダウンロードします。Linux版は3種類あって、debianとcentos用は32bit版も用意されています。
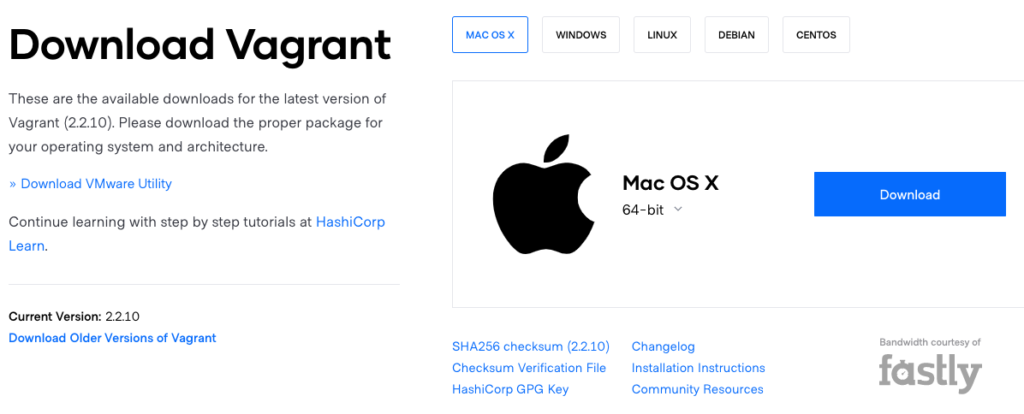
- Windows:32bit版、64bit版
- MacOS:64bit版
- Linux:汎用64bit版、debian 32bit版・64bit版、centos 32bit版・64bit版
利用中のパソコンへのインストールですが、Windows版もMac版もインストーラの指示に従うだけで特に難しくないので割愛します。
なお、Vagrantを使うのにVirtualBoxやVMwareなどの仮想化ソフトがセットで必要になります。
いずれもWindows、Mac、Linux版が用意されていますが、今回は全ての機能が無料で使えるVirtualBoxと組み合わせて利用します。
WindowsまたはMacへのVirtualBoxのインストール方法については、LPI-Japanの標準教科書をはじめ様々な教材でも紹介されているので割愛します。
VagrantおよびVirtualBoxのLinux実機への導入についても今回は割愛します。(別な機会に紹介するかもしれません)
Vagrantの初期設定
Vagrantのインストールが終了したらターミナルソフトを起動します。
WindowsであればコマンドプロンプトまたはPowerShell、MacOSであればターミナルを利用しましょう。
$ vagrant -v
と入力して、まずはVagrantが正しくイントールされたかを確認。
$ vagrant -v
Vagrant 2.2.10
ちなみに、vagrantコマンドのみで主なコマンドの内容が確認できます。
$ vagrant
$ vagrant
Usage: vagrant [options] <command> [<args>] -h, --help Print this help.
Common commands: autocomplete manages autocomplete installation on host box manages boxes: installation, removal, etc. cloud manages everything related to Vagrant Cloud destroy stops and deletes all traces of the vagrant machine global-status outputs status Vagrant environments for this user halt stops the vagrant machine help shows the help for a subcommand init initializes a new Vagrant environment by creating a Vagrantfile login package packages a running vagrant environment into a box plugin manages plugins: install, uninstall, update, etc. port displays information about guest port mappings powershell connects to machine via powershell remoting provision provisions the vagrant machine push deploys code in this environment to a configured destination rdp connects to machine via RDP reload restarts vagrant machine, loads new Vagrantfile configuration resume resume a suspended vagrant machine snapshot manages snapshots: saving, restoring, etc. ssh connects to machine via SSH ssh-config outputs OpenSSH valid configuration to connect to the machine status outputs status of the vagrant machine suspend suspends the machine up starts and provisions the vagrant environment upload upload to machine via communicator validate validates the Vagrantfile version prints current and latest Vagrant version winrm executes commands on a machine via WinRM winrm-config outputs WinRM configuration to connect to the machine
(以下省略)
vagrantのステータス確認コマンド。
$ vagrant status
$ vagrant status
Current machine states:
default not created (virtualbox)
The environment has not yet been created. Run `vagrant up` to
create the environment. If a machine is not created, only the
default provider will be shown. So if a provider is not listed,
then the machine is not created for that environment.
この段階で何も動作していないことがわかります。また、以下のコマンドでVagrant用のイメージファイル(boxと呼ばれています)の一覧を表示できます。
$ vagrant box list
まだイメージファイルを入手できていないのでboxが無いと表示されます。
$ vagrant box list
There are no installed boxes! Use `vagrant box add` to add some.
Vagrantのイメージファイルを入手
次にVagrant Cloudから仮想マシンのイメージファイルをダウンロードします。今回はVirtualBox用のCentOS7のイメージファイルを入手します。
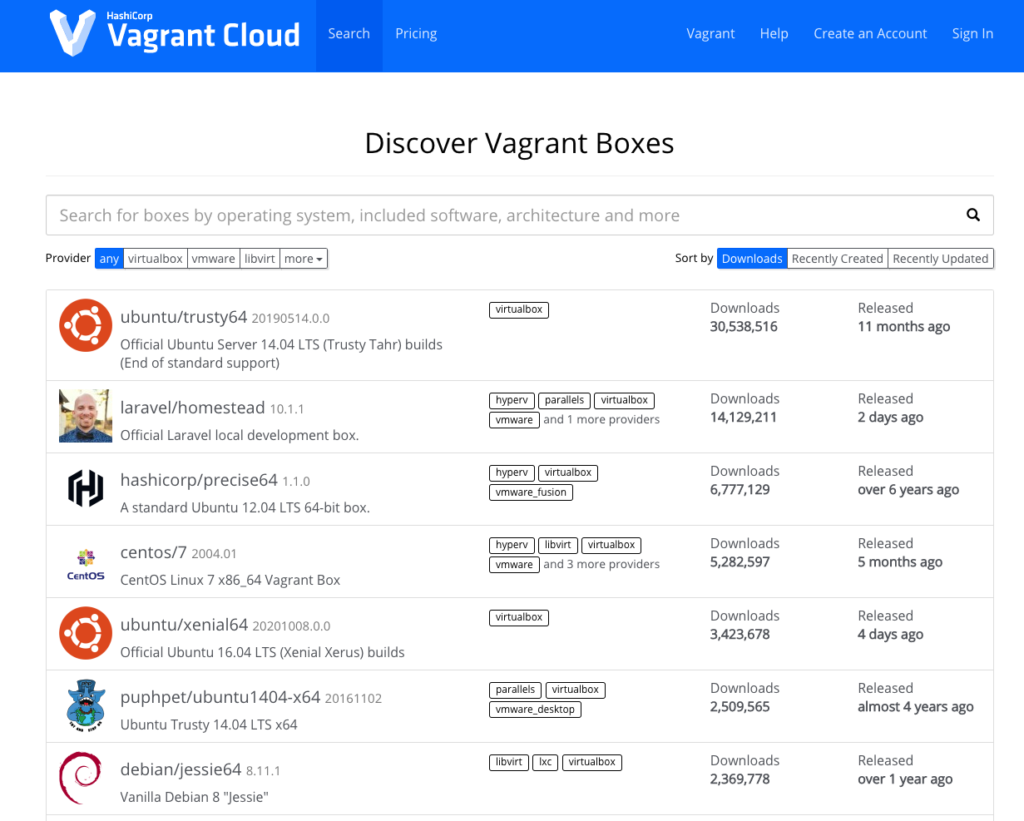
下記コマンドのbox名に一覧に記載されている書式のまま「centos/7」を入力すれば、自動的にイメージファイルをダウンロードしてくれます。
$ vagrant box add [box名]
「centos/7」のイメージは4種類あるので3のvirtualboxを選択。
$ vagrant box add centos/7
==> box: Loading metadata for box 'centos/7' box: URL: https://vagrantcloud.com/centos/7
This box can work with multiple providers! The providers that it
can work with are listed below. Please review the list and choose
the provider you will be working with.
1) hyperv
2) libvirt
3) virtualbox
4) vmware_desktop
Enter your choice: 3
==> box: Adding box 'centos/7' (v2004.01) for provider: virtualbox box: Downloading: https://vagrantcloud.com/centos/boxes/7/versions/2004.01/providers/virtualbox.box
Download redirected to host: cloud.centos.org box: Calculating and comparing box checksum...
==> box: Successfully added box 'centos/7' (v2004.01) for 'virtualbox'!
仮想マシンの設定
設定前にあらかじめVagrant用のディレクトリを作成することをオススメします。複数の仮想マシンを利用する事も想定して、さらにディストリビューション毎の階層を作るとよりわかりやすいと思います。
例)/home/[username]/vagrant/centos7
$ cd ~/vagrant/centos7
その上で当該ディレクトリに移動しておきましょう。
準備ができたら下記コマンドでCentOS7用の設定を行います。
$ vagrant init [box名]
box名に先ほどインストールしたイメージファイル「centos/7」を入力して実行。
$ vagrant init centos/7
A `Vagrantfile` has been placed in this directory. You are now
ready to `vagrant up` your first virtual environment! Please read
the comments in the Vagrantfile as well as documentation on
`vagrantup.com` for more information on using Vagrant.
設定が完了すると、カレントディレクトリ上に「Vagrantfile」ファイルが作成されます。このファイルはcatやviなどで確認できます。
$ cat Vagrantfile
# -*- mode: ruby -*-
# vi: set ft=ruby :
# All Vagrant configuration is done below. The "2" in Vagrant.configure
# configures the configuration version (we support older styles for
# backwards compatibility). Please don't change it unless you know what
# you're doing.
Vagrant.configure("2") do |config| # The most common configuration options are documented and commented below. # For a complete reference, please see the online documentation at # https://docs.vagrantup.com. # Every Vagrant development environment requires a box. You can search for # boxes at https://vagrantcloud.com/search. config.vm.box = "centos/7" <--これ
(以下省略)
1行だけコメントアウトした部分を見るとVirtualBoxに対応したcentos/7の設定がされていることがわかります。特に変更などはしないでOKです。以上で基本的な準備は完了。
Vagrantの実行
以下のコマンドでVagrantを実行します。
$ vagrant up
VitrulalBoxが起動していない場合は自動的に起動し、centos/7のイメージを読み込み、仮想マシンとしてCentOS7を起動します。
$ vagrant up
Bringing machine 'default' up with 'virtualbox' provider...
==> default: Importing base box 'centos/7'...
==> default: Matching MAC address for NAT networking...
==> default: Checking if box 'centos/7' version '2004.01' is up to date...
==> default: Setting the name of the VM: centos7_default_1602487271595_36466
==> default: Clearing any previously set network interfaces...
==> default: Preparing network interfaces based on configuration... default: Adapter 1: nat
==> default: Forwarding ports... default: 22 (guest) => 2222 (host) (adapter 1)
==> default: Booting VM...
==> default: Waiting for machine to boot. This may take a few minutes... default: SSH address: 127.0.0.1:2222 default: SSH username: vagrant default: SSH auth method: private key default: default: Vagrant insecure key detected. Vagrant will automatically replace default: this with a newly generated keypair for better security. default: default: Inserting generated public key within guest... default: Removing insecure key from the guest if it's present... default: Key inserted! Disconnecting and reconnecting using new SSH key...
==> default: Machine booted and ready!
==> default: Checking for guest additions in VM... default: No guest additions were detected on the base box for this VM! Guest default: additions are required for forwarded ports, shared folders, host only default: networking, and more. If SSH fails on this machine, please install default: the guest additions and repackage the box to continue. default: default: This is not an error message; everything may continue to work properly, default: in which case you may ignore this message.
==> default: Rsyncing folder: /Users/yasumizu/vagrant/centos7/ => /vagrant
起動後、ステータスは以下の通り。
$ vagrant status
Current machine states:
default                   running (virtualbox)
The VM is running. To stop this VM, you can run `vagrant halt` to
shut it down forcefully, or you can run `vagrant suspend` to simply
suspend the virtual machine. In either case, to restart it again,
simply run `vagrant up`.
仮想マシンへの接続
仮想マシンに接続するのにsshコマンドを入力します。
$ vagrant ssh
コンソールが変わり、vagrantユーザーとしてログインできたのがわかると思います。unameやidコマンドで情報を確認してみましょう。
$ vagrant ssh
[vagrant@localhost ~]$ uname -a
Linux localhost.localdomain 3.10.0-1127.el7.x86_64 #1 SMP Tue Mar 31 23:36:51 UTC 2020 x86_64 x86_64 x86_64 GNU/Linux
[vagrant@localhost ~]$ id
uid=1000(vagrant) gid=1000(vagrant) groups=1000(vagrant) context=unconfined_u:unconfined_r:unconfined_t:s0-s0:c0.c1023
念のため、yumコマンドで最新にアップデートしておきましょう。
$ sudo yum update
Failed to set locale, defaulting to C
Loaded plugins: fastestmirror
Determining fastest mirrors * base: ftp.iij.ad.jp * extras: ftp.iij.ad.jp * updates: ftp.iij.ad.jp
base | 3.6 kB 00:00:00
extras | 2.9 kB 00:00:00
updates | 2.9 kB 00:00:00
(1/4): base/7/x86_64/group_gz | 153 kB 00:00:00
(2/4): extras/7/x86_64/primary_db | 206 kB 00:00:00
(3/4): updates/7/x86_64/primary_db | 4.5 MB 00:00:01
(4/4): base/7/x86_64/primary_db | 6.1 MB 00:00:01
Resolving Dependencies
--> Running transaction check
---> Package bind-export-libs.x86_64 32:9.11.4-16.P2.el7_8.2 will be updated
---> Package bind-export-libs.x86_64 32:9.11.4-16.P2.el7_8.6 will be an update
---> Package binutils.x86_64 0:2.27-43.base.el7 will be updated
---> Package binutils.x86_64 0:2.27-43.base.el7_8.1 will be an update
---> Package ca-certificates.noarch 0:2019.2.32-76.el7_7 will be updated
(以下省略)
仮想マシンの停止
利用中の仮想マシンを停止する場合は、ログアウト後にhaltコマンドを入力して実行します。
$ vagrant halt
[vagrant@localhost ~]$ exit
logout
Connection to 127.0.0.1 closed.
$ vagrant halt
==> default: Attempting graceful shutdown of VM...
haltコマンドを実行しない限り仮想マシンは実行されたままなので注意しましょう。
参考
標準的なコマンド
| vagrant box add address | イメージファイルを追加 | |
| vagrant box list | イメージファイルの一覧表示 | |
| vagrant status [name|id] | 仮想マシンの状態表示 | 注1 |
| vagrant init [name [url]] | 仮想マシンの初期設定 | |
| vagrant up | 仮想マシンの起動 | 注2 |
| vagrant ssh | 仮想マシンに接続 | 注2 |
| vagrant halt | 仮想マシンの終了 | 注2 |
注1:Vagrantfileが存在するディレクトリ以外で「vagrant status」のみの入力はエラーになります。任意のディレクトリにいる時はvagrant global-statusコマンドでidが確認してステータス確認できます。
$ vagrant global-status
id name provider state directory
------------------------------------------------------------------------
813bedc default virtualbox running /Users/yasumizu/vagrant/centos7
$ vagrant status 813bedc
Current machine states:
default running (virtualbox)
注2:up/ssh/haltの後にvagrant global-statusコマンドで確認したidを入力すればVagrantfileが無い任意のディレクトリからでも実行が可能です。
$ vagrant up 813bedc
Bringing machine 'default' up with 'virtualbox' provider...
==> default: Checking if box 'centos/7' version '2004.01' is up to date...
==> default: Clearing any previously set forwarded ports...
==> default: Clearing any previously set network interfaces...
==> default: Preparing network interfaces based on configuration... default: Adapter 1: nat
==> default: Forwarding ports... default: 22 (guest) => 2222 (host) (adapter 1)
==> default: Booting VM...
==> default: Waiting for machine to boot. This may take a few minutes... default: SSH address: 127.0.0.1:2222 default: SSH username: vagrant default: SSH auth method: private key
==> default: Machine booted and ready!
==> default: Checking for guest additions in VM... default: No guest additions were detected on the base box for this VM! Guest default: additions are required for forwarded ports, shared folders, host only default: networking, and more. If SSH fails on this machine, please install default: the guest additions and repackage the box to continue. default: default: This is not an error message; everything may continue to work properly, default: in which case you may ignore this message.
==> default: Rsyncing folder: /Users/yasumizu/vagrant/centos7/ => /vagrant
==> default: Machine already provisioned. Run `vagrant provision` or use the `--provision`
==> default: flag to force provisioning. Provisioners marked to run always will still run.
$ vagrant ssh 813bedc
Last login: Mon Oct 12 20:54:13 2020 from 10.0.2.2
[vagrant@localhost ~]$
rootへの切り換え
vagrantユーザーからrootユーザーへの切替ですが、vagrantユーザー、rootともに標準のパスワードは「vagrant」です。必要に応じて変更しましょう。
[vagrant@localhost ~]$ su -
Password: (vagrant--通常は見えません)
Last failed login: Mon Oct 12 16:24:33 JST 2020 on pts/0
[root@localhost ~]#
MacOS版の挙動
今回は見本としてMacOS版VagrantでCentOSを導入しましたが、標準で言語設定は日本語になっていたものの、タイムゾーンはUTFになっていました。
[vagrant@localhost ~]$ echo $LANG
ja_JP.UTF-8
[vagrant@localhost ~]$ date
Mon Oct 12 07:27:27 UTC 2020
[vagrant@localhost ~]$ locale
locale: Cannot set LC_CTYPE to default locale: No such file or directory
locale: Cannot set LC_MESSAGES to default locale: No such file or directory
locale: Cannot set LC_ALL to default locale: No such file or directory
LANG=ja_JP.UTF-8
LC_CTYPE="ja_JP.UTF-8"
LC_NUMERIC="ja_JP.UTF-8"
LC_TIME="ja_JP.UTF-8"
LC_COLLATE="ja_JP.UTF-8"
LC_MONETARY="ja_JP.UTF-8"
LC_MESSAGES="ja_JP.UTF-8"
LC_PAPER="ja_JP.UTF-8"
LC_NAME="ja_JP.UTF-8"
LC_ADDRESS="ja_JP.UTF-8"
LC_TELEPHONE="ja_JP.UTF-8"
LC_MEASUREMENT="ja_JP.UTF-8"
LC_IDENTIFICATION="ja_JP.UTF-8"
LC_ALL=
気になる場合はtimedatectlコマンドでJSTに変更しましょう。
$ sudo timedatectl set-timezone Asia/Tokyo
または
# timedatectl set-timezone Asia/Tokyo
[vagrant@localhost ~]$ sudo timedatectl set-timezone Asia/Tokyo
[vagrant@localhost ~]$ date
date
Mon Oct 12 16:30:57 JST 2020
参考にしたいサイト
【初歩の初歩】Vagrantのインストールと使い方を簡単解説
お役立ちサイト紹介で取りあげた「エンジニアの入り口」のコンテンツです。